Author: paul

  • Amazing Audio Case Study: Hey There Daliah

    HeyThereDaliah Thumbnail

    Case Study: HeyThereDaliah

    The Challenge

    Our client, a gaming streamer with the username HeyThereDaliah on Twitch, was experiencing audio issues with her Elgato Wave Link audio interface. Her microphone was not being picked up by OBS for her stream, nor by her in-game chat (specifically within GTA V’s FiveM container). This significantly hindered her ability to create content and interact with her audience.

    The primary hurdle was correctly configuring the audio routing options within the Elgato Wave Link software, which includes a virtual mixer and VST effects. Additionally, the client needed to ensure her earbuds, plugged into the Wave Link’s headphone jack, were functional as a Windows playback device, and that her microphone with effects was correctly routed to both OBS and her game.

    Elgato Wave Link Expert Setup

    The Amazing Audio Solution

    After the client reached out, we arranged a remote support session. I connected with the client via a phone call and used AnyDesk for the remote desktop connection, allowing me to diagnose her audio configuration problems methodically.

    • Enabling Headphone Output: My first step was to address the client’s inability to hear audio through her Wave Link headphones. I navigated to Windows Sound Settings and found that the headphone output was disabled as a playback device. Enabling this allowed it to be selected as the default sound option, and a quick test confirmed audio was playing through her earbuds.
    • OBS Microphone Input Configuration: With the headphone output resolved, we moved to OBS. I guided the client to select the “Wave Link Microphone with FX” as her primary audio input device for the stream.
    • OBS Audio Monitoring Setup: In OBS’s audio settings, we set the default audio output to the Elgato Wave Link headphone output. This allowed the client to monitor her microphone audio (with effects applied by Wave Link) directly through OBS, confirming the correct input.
    • In-Game Chat Integration (GTA V / FiveM): To ensure her microphone worked in-game, we launched GTA V within the FiveM container. I guided the client to select “Elgato Wave Link Microphone with FX” as the default input for voice chat, and the Elgato headphone output as the output. A system restart was required for the game to fully recognize these audio changes.

    The Result

    After the restart, the client entered a game server and successfully tested her voice chat, confirming that other players could hear her clearly and with her desired microphone effects.

    She now had fully functional audio running both in and out of her headphones, directly through her Elgato Wave Link device. Crucially, she gained a clear understanding of the complex audio routing within her setup, empowering her to manage and troubleshoot these options confidently in the future. Her ability to stream and engage in in-game chat was fully restored and optimised.

    Client Review from HeyThereDaliah

    Client Feedback

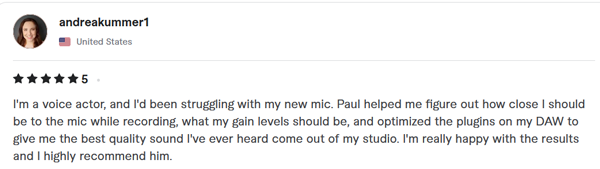
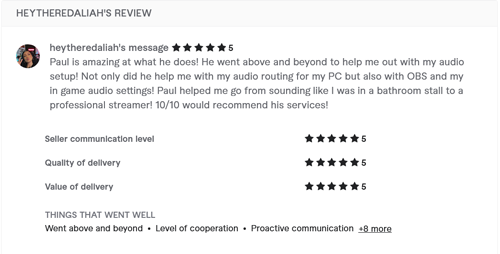
    After the session, Daliah left this fantastic 5-star review:

    “Paul is amazing at what he does! He went above and beyond to help me out with my audio setup! Not only did he help me with my audio routing for my PC but also with OBS and my in game audio settings! Paul helped me go from sounding like I was in a bathroom stall to a professional streamer! 10/10 would recommend his services!”

    Key Takeaways & Expert Insight

    This case highlights a common challenge for streamers: bridging the gap between sophisticated audio hardware, virtual mixing software, and the varying audio demands of streaming platforms and games. It’s not just about selecting a microphone; it’s about understanding the entire signal chain.

    • Virtual Mixers & OS Settings: Complex audio interfaces integrate deeply with the operating system. Overlooked OS sound settings can block crucial audio paths.
    • Layered Configuration: Achieving optimal audio requires configuring not just OBS, but also the interface’s proprietary software and the game’s internal audio settings.
    • Input/Output Precision: Carefully selecting the exact input/output devices (e.g., “microphone with effects“) is critical when using virtual mixers that offer multiple signal tap points.

    Stop Guessing with Your Audio Routing

    Just like Daliah, you can have a flawless, professional stream setup. Our remote engineers will untangle your virtual audio cables and optimize your entire software chain so everything just works.

    Thanks, ! You’re officially on the list. Keep an eye on your inbox for your confirmation email.
  • Amazing Audio Case Study: Reel Time With Mark

    Reel Time with Mark Thumbnail

    Case Study: Reel Time with Mark

    Reel Time with Mark YouTube Channel

    The Challenge

    Mark is a popular YouTube content creator known as “Reel Time with Mark,” where he broadcasts live slot game gameplay to his dedicated audience. However, he was experiencing significant issues with his live stream audio using OBS (Open Broadcaster Software).

    His audience had started complaining about poor volume and overall sound quality, which was impacting viewer experience and engagement. He had spent hours listening to generic online tutorials, but nothing worked. He needed expert help to ensure his voice was clear, consistent, and professional.

    Audience comments complaining about audio

    The Amazing Audio Solution

    Mark booked a remote support session, and we connected via AnyDesk and WhatsApp. To ensure absolute accuracy, I installed the Audio Movers “ListenTo” plugin directly within his OBS setup, allowing me to hear exactly what his audience was hearing in real-time. We then systematically built a professional audio chain.

    • Systematic Microphone Setup Validation: Before touching any software, we checked the physical hardware. I guided Mark on proper positioning, optimal distance, and polar pattern utilization to ensure the cleanest possible source audio.
    • Noise Reduction: We applied a precision filter in OBS to effectively eliminate unwanted background noise from his gaming environment.
    • Dynamic Compression: We installed and fine-tuned a compressor to bring up his overall volume. This ensured his speech levels remained consistent, making him clearly audible even when speaking softly during tense moments.
    • Brickwall Limiting: I added a limiter to act as a safeguard, preventing any sudden loud sounds or excited shouts from causing digital clipping and distortion.
    • Audibility Testing: We conducted extensive live tests at various speaking volumes—from soft whispers to excited shouts—ensuring his voice remained consistently clear, punchy, and free from distortion.

    The Result

    By the end of the 60-minute session, Mark’s live stream audio was transformed. The inconsistent volume and muffled clarity were completely resolved.

    He was so thrilled with the results that during his very next stream, he immediately addressed his audience about the improved sound:

    “Good morning everybody… I have new sound, I hope it sounds okay… I think it does though. He was amazing, he was really amazing. And friendly… If you need help with your sound and if you think this sounds good, let me know.”
    Mark giving a thumbs up on stream

    Client Feedback

    Mark later provided this incredible review of our time working together:

    “Paul is exactly what you are hoping you’ll get when you hire a service like his. My sound was getting complaints from my YouTube followers. I listened to countless voices online telling me what to do with my settings and none of them worked. Paul set a date and time with me and called at the exact minute of the appointment. He made a copy of my sound settings and had me recreate what I do online, and when he was done, I sounded amazing (or as amazing as a nonprofessional can sound). Did I mention he is easy to talk to, friendly, smart, and takes what he does seriously? If you have any issues with your sound or if you are wondering if your sound could be improved… ‘Better Call Paul’.”

    Stop Losing Viewers to Bad Audio

    Just like Mark, you can achieve broadcast-ready sound without buying expensive new gear. Our remote engineers will optimize your OBS setup and microphone technique so you can focus on creating great content.

    Thanks, ! You’re officially on the list. Keep an eye on your inbox for your confirmation email.
  • Amazing Audio Case Study: Andrea Kummer

    Andrea Kummer Thumbnail

    Case Study: Andrea Kummer

    The Challenge

    Andrea, a talented voice actor, was ready to take her home studio to the next level. After investing in a new Rode NT1-A microphone and a Focusrite Scarlett Solo interface, she was excited to start recording. However, she was quickly disappointed with the results.

    Despite hours spent watching YouTube tutorials and experimenting with plugins in Reaper, her audio sounded thin and lacked the professional quality she needed. Frustrated and unsure of her next step, she reached out for help.

    The Amazing Audio Solution

    Andrea booked a 90-minute Pro Audio Setup session, and we began a detailed, step-by-step diagnostic of her entire signal chain. We discovered that the solution was not more plugins or new gear, but a precise focus on the fundamentals.

    • Acoustics & Mic Placement: We began by making subtle adjustments to her microphone’s position in the room to minimize unwanted reflections and ensure a clean recording environment. We also fine-tuned her distance from the microphone to find the perfect spot for her voice.
    • Hardware Configuration: We verified all the settings on her Focusrite Scarlett Solo to ensure the gain was correctly set and the audio signal was clean, avoiding any distortion.
    • Software Optimization: Inside her DAW, Reaper, we confirmed that all settings were optimized for her new interface. After some listening tests, we found that Andrea’s recording environment and the quality of her gear meant that heavy-handed EQ was not needed at all. Instead, we applied only a slight amount of light compression and a gentle low-end roll-off to give her voice a professional presence without sacrificing its natural tone.

    The Result

    After the session, Andrea completed a few quick test recordings. The difference was immediate and dramatic. The sound was rich, full, and perfectly captured the quality of her new microphone.

    Her response was the best measure of success: “This is the best quality sound I’ve ever heard come out of my studio.”

    Client Review from Andrea

    Get Your Pro Audio Setup

    Just like Andrea, you can get professional-quality sound from your home studio. Our remote engineers will diagnose and optimize your entire signal chain, so you can stop troubleshooting and start creating.

    Thanks, ! You’re officially on the list. Keep an eye on your inbox for your confirmation email.